Creating an IPsec Tunnel in pfSense #
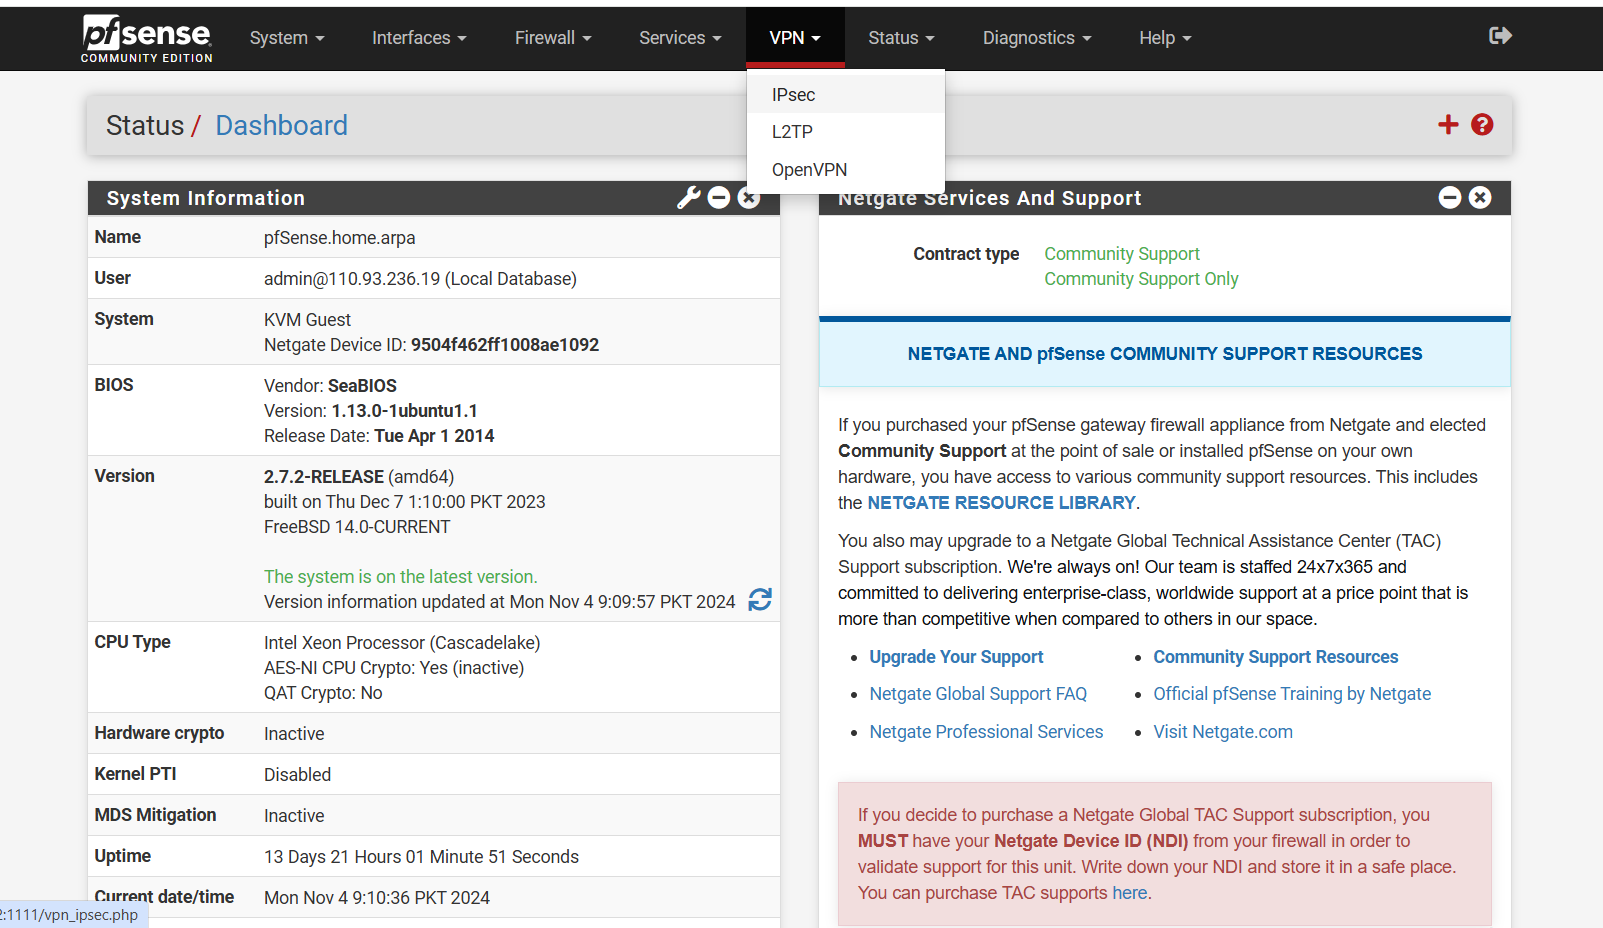
Step 1: Open the IPsec Configuration Page
- From the top menu bar, click on VPN.
- In the dropdown menu, select IPsec.
This will take you to the IPsec configuration page where you can start setting up a new tunnel.
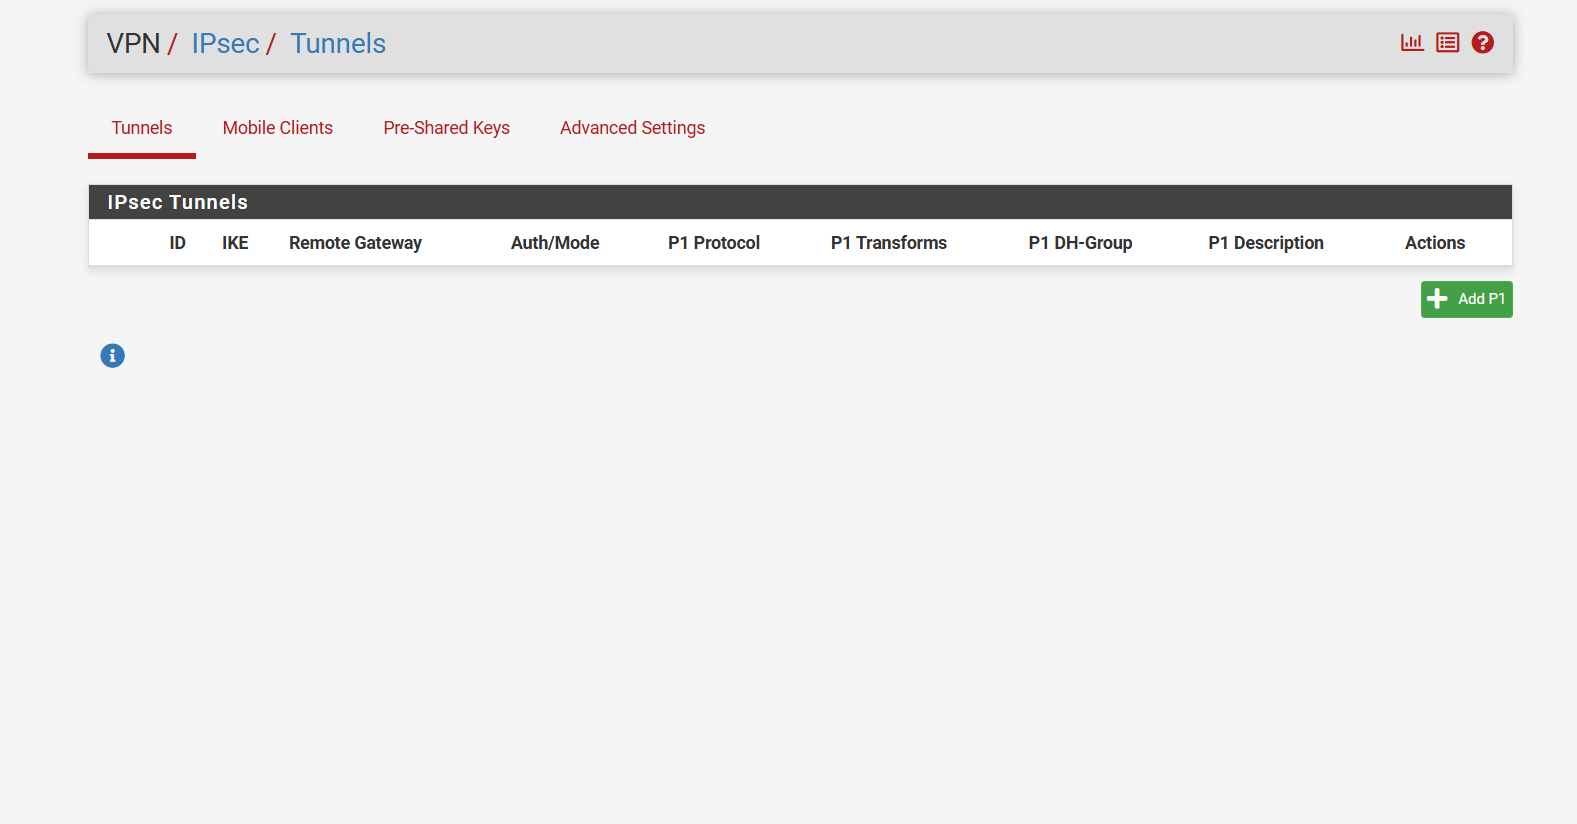
Step 2: Create Phase 1 of the IPsec Tunnel
- On the IPsec page, click Add P1 to create Phase 1 of the IPsec tunnel.
This is the first step in setting up the secure connection between two networks.
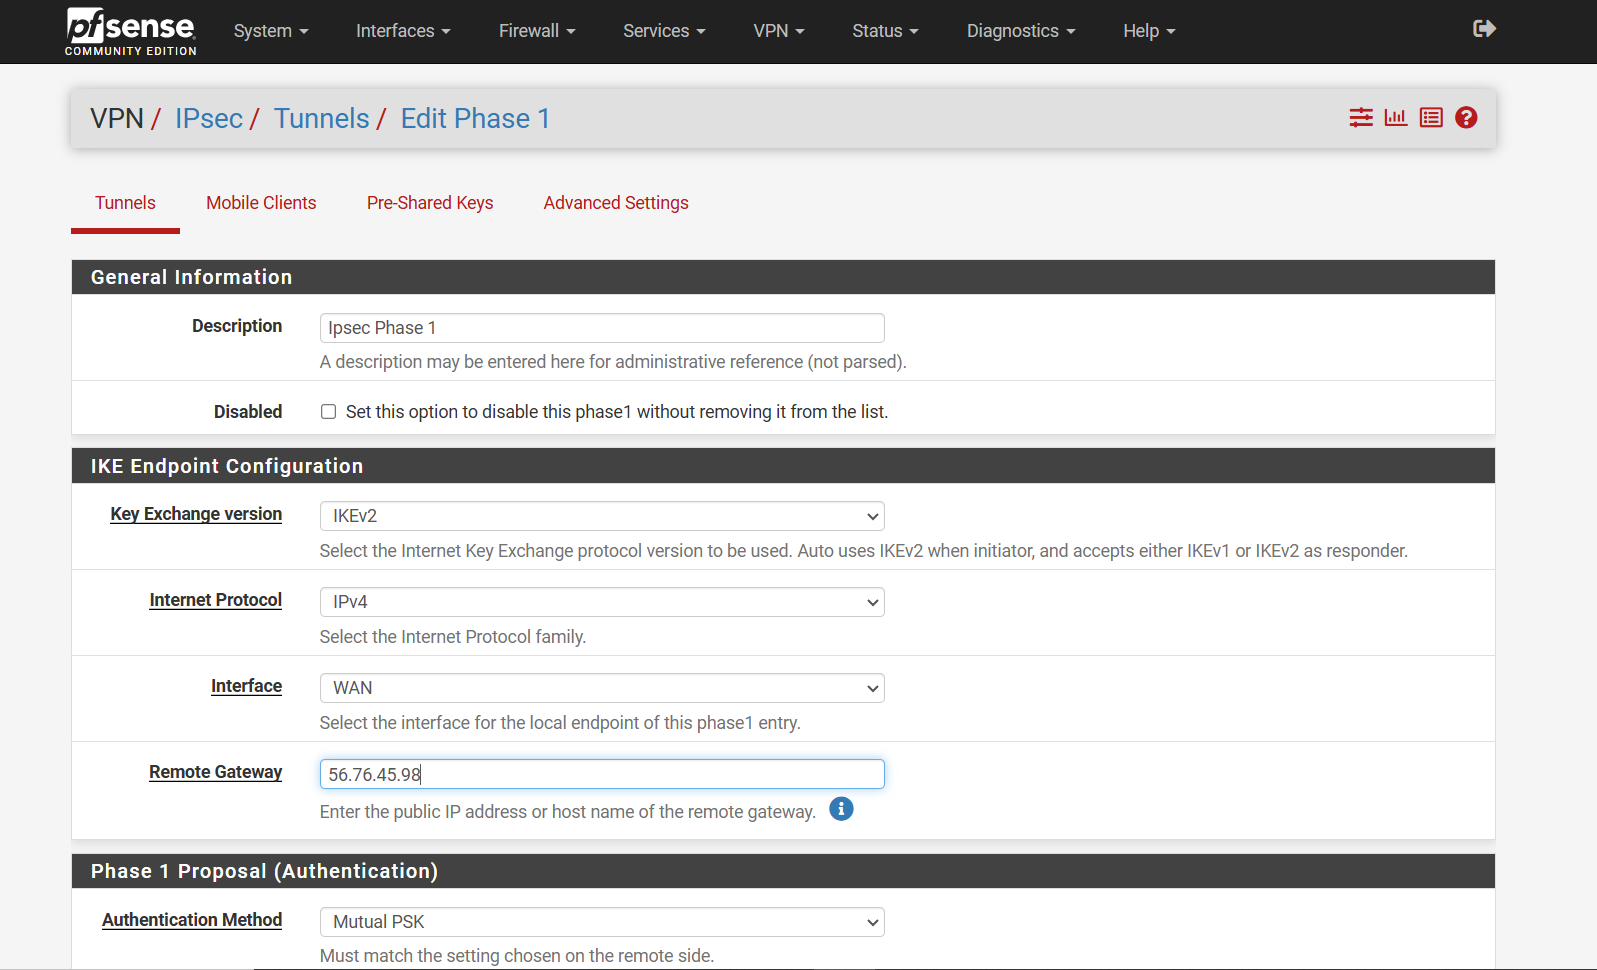
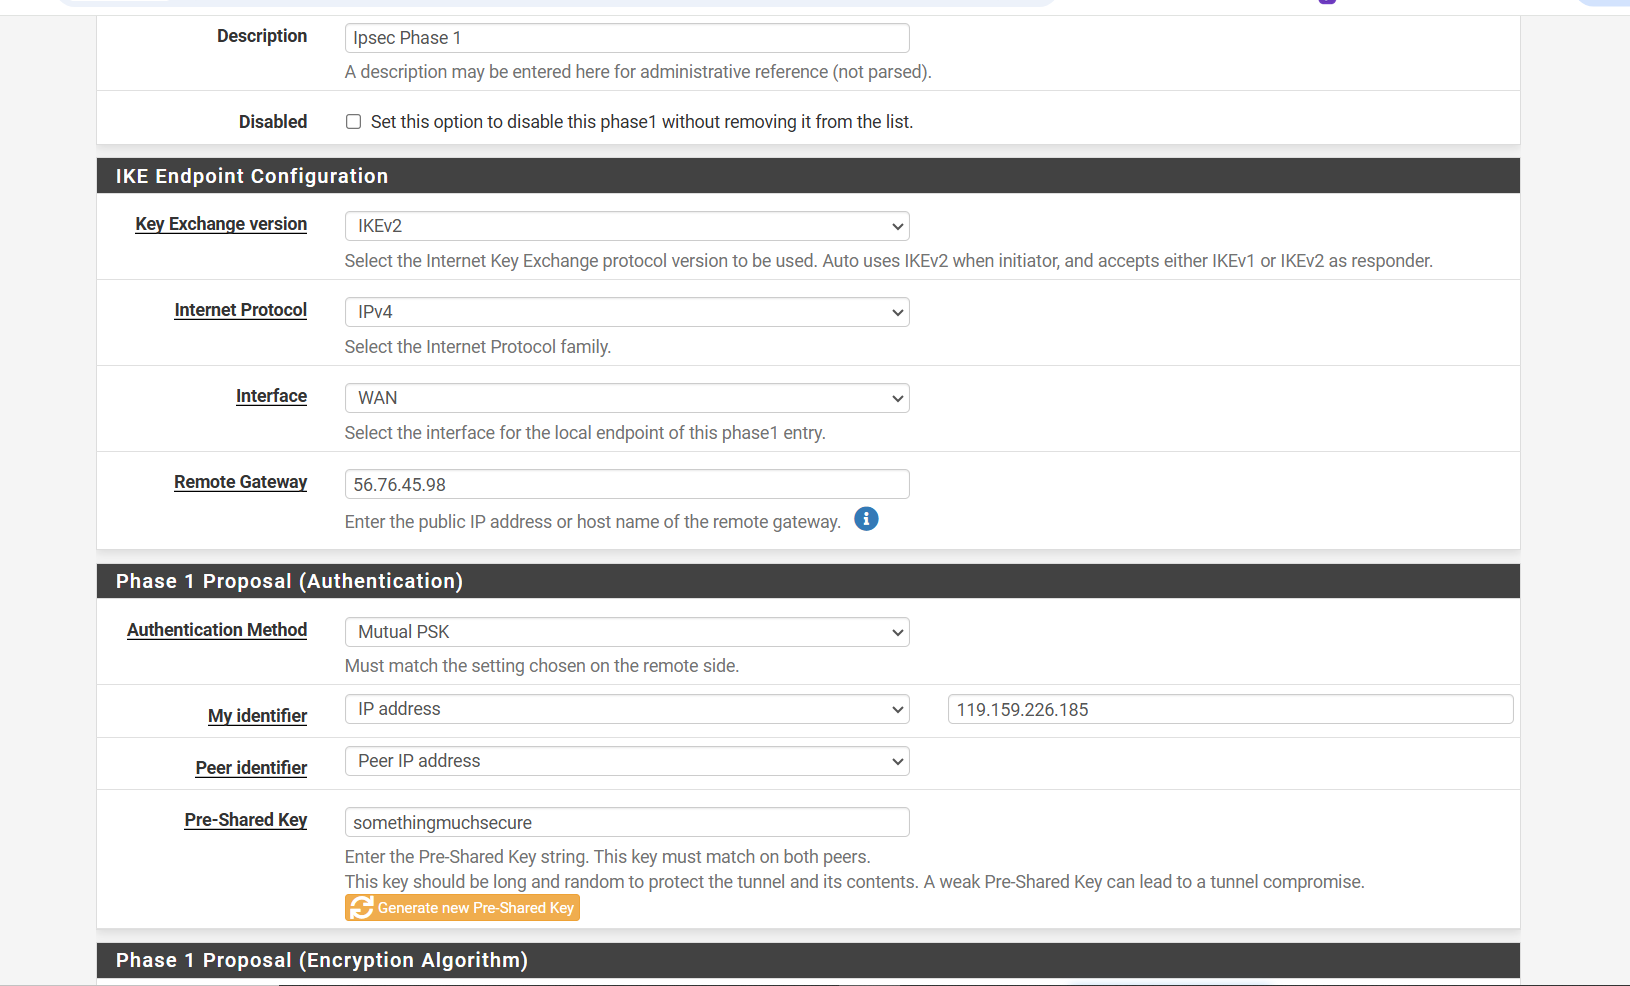
Step 3: Fill in the Phase 1 Settings
On the Phase 1 configuration page, provide the required details based on your specific environment.
- Most of the settings (like Internet Protocol and Interface) are already set to default and usually do not need to be changed.
- Choose IKE Version (v1 or v2) based on what is required for your setup.
- For Remote Gateway, enter the Public IP address of the remote network you are connecting to.
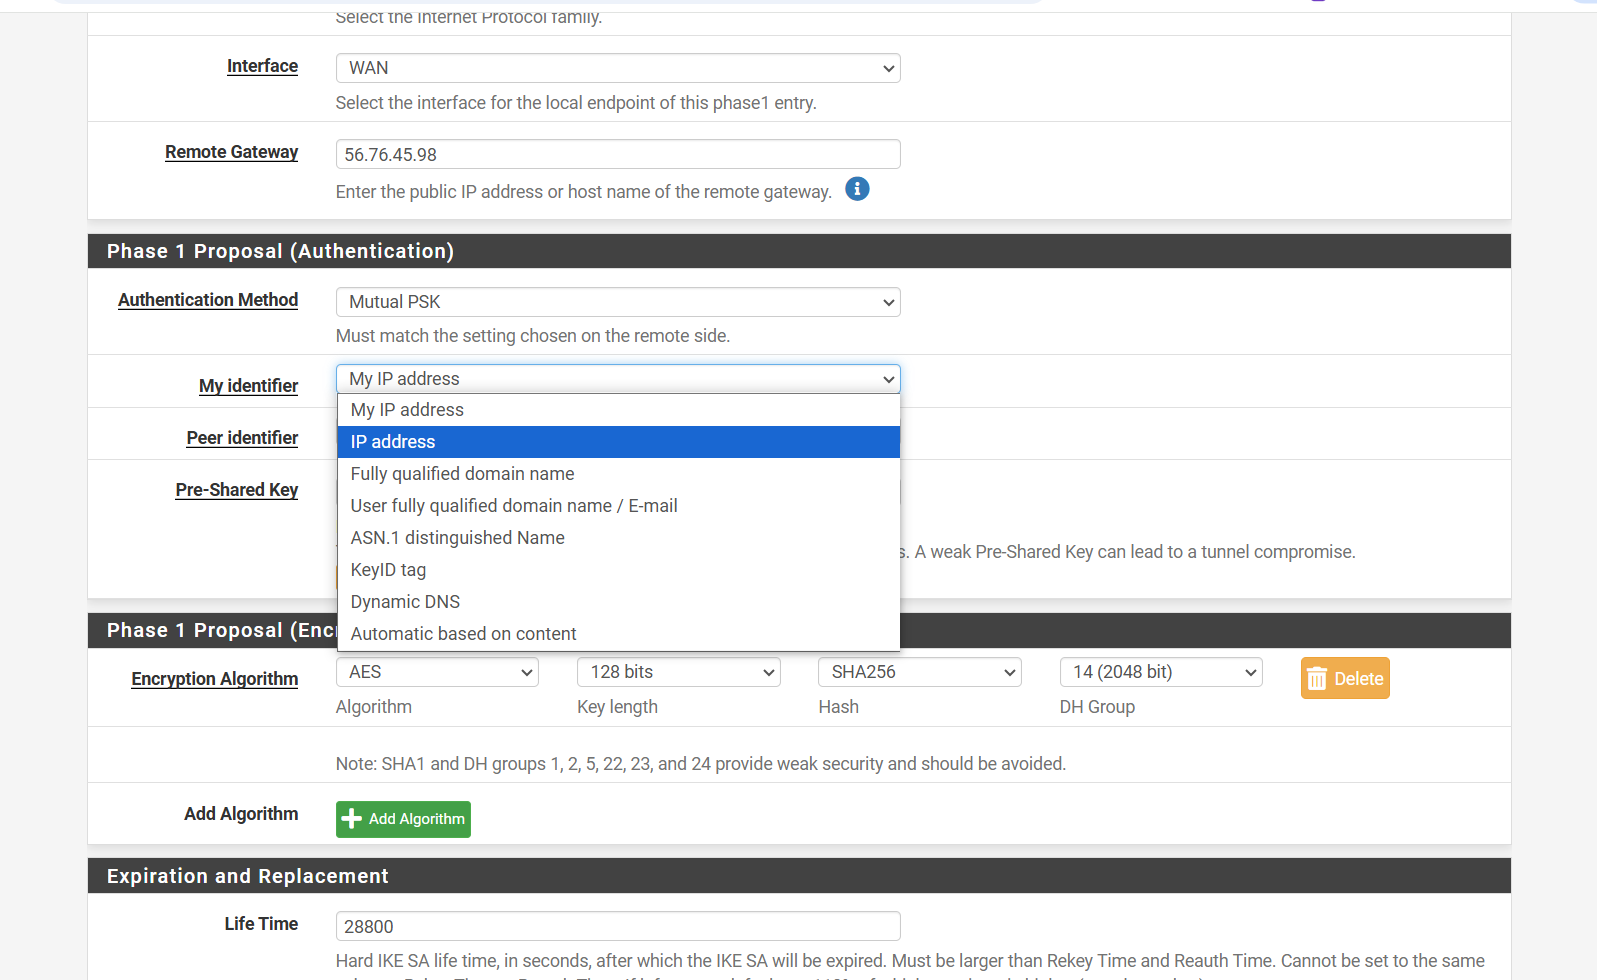
Step 4: Configure the Authentication Settings
In the Authentication (Proposal) section:
- For My Identifier, select IP address, and enter your own public IP address.
- For Peer Identifier, select Peer IP address.
Next, set a secure Pre-Shared Key. This key must be shared with the remote network team, as they will enter the same key on their side.
⚠️ Important: The Pre-Shared Key must match on both sides, or Phase 1 will fail to connect.
Step 5: Review Your Configuration So Far
At this stage, your Phase 1 configuration should look something like this:
- Interface: WAN (or your public-facing interface)
- Remote Gateway: [Remote site’s public IP]
- Internet Protocol: IPv4
- IKE Version: IKEv1 or IKEv2 (based on your requirement)
- My Identifier: IP address – [Your public IP]
- Peer Identifier: Peer IP address
- Pre-Shared Key: [A strong key shared with the remote site]
Take a moment to double-check the settings. Once confirmed, click Save to complete Phase 1 setup.
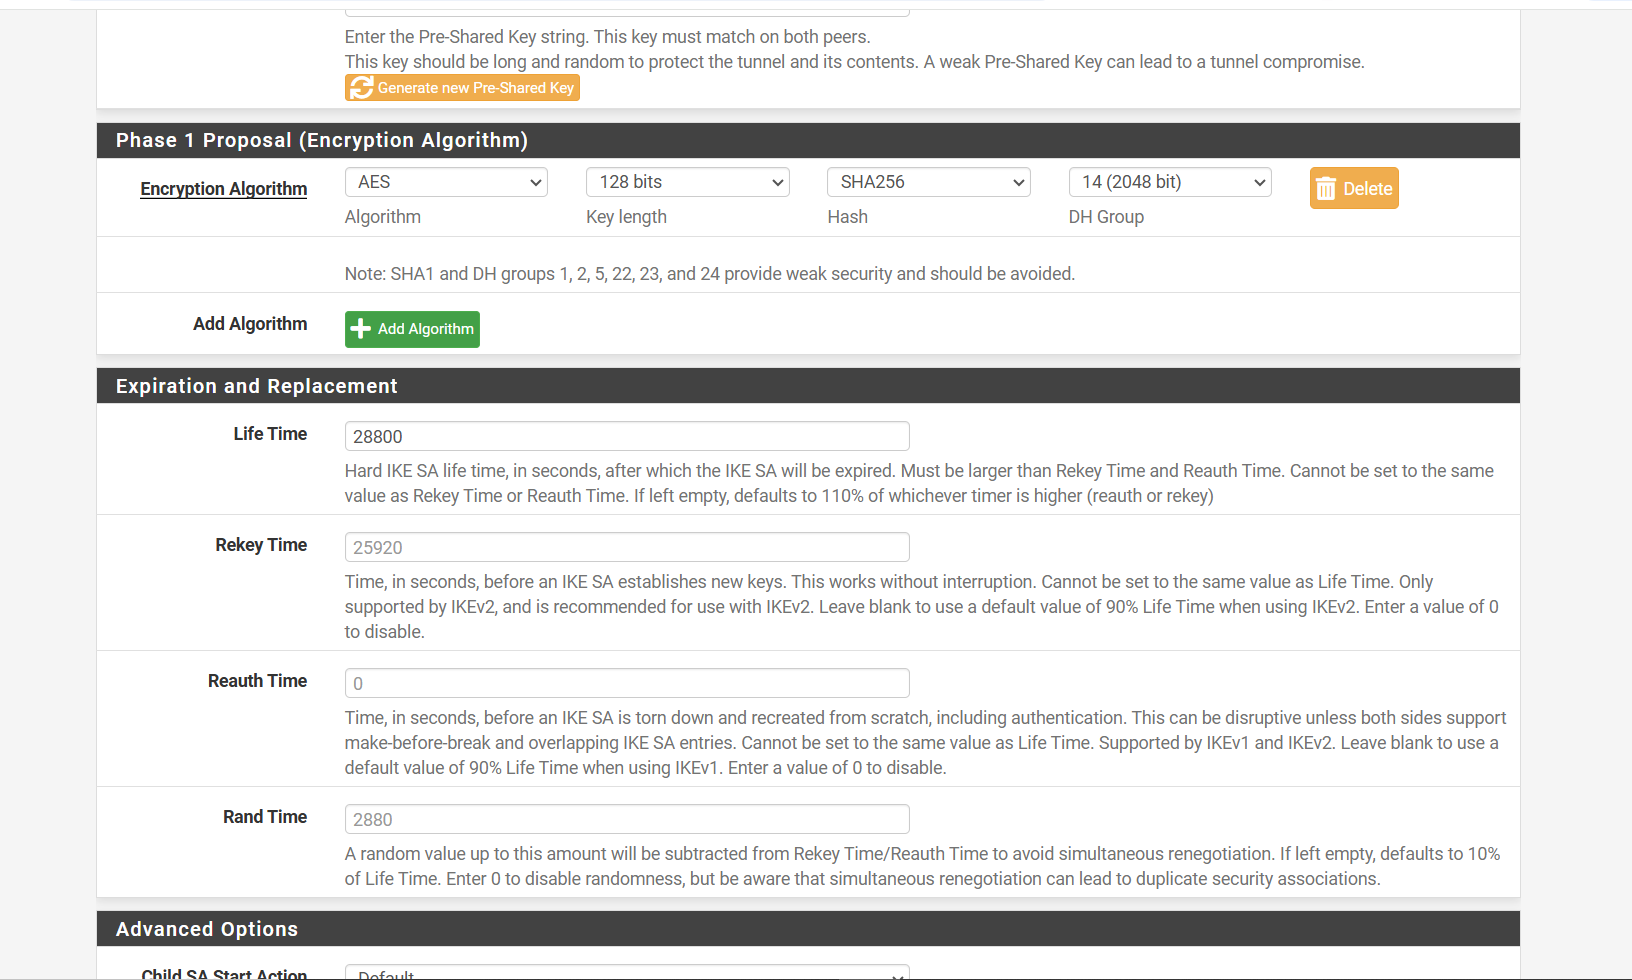
Step 6: Set Encryption Options
In the Encryption section:
- Select your preferred encryption and authentication algorithms for stronger security. Choose the ones recommended by your organization or use standard secure options (like AES and SHA256).
- The lifetime value determines how long a security association remains valid. The default value is 28800 seconds (8 hours) in pfSense.
You can change the lifetime if needed. Once set, pfSense will automatically calculate and apply the remaining timing settings based on this value.
After making your selections, click Save to complete the Phase 1 configuration.
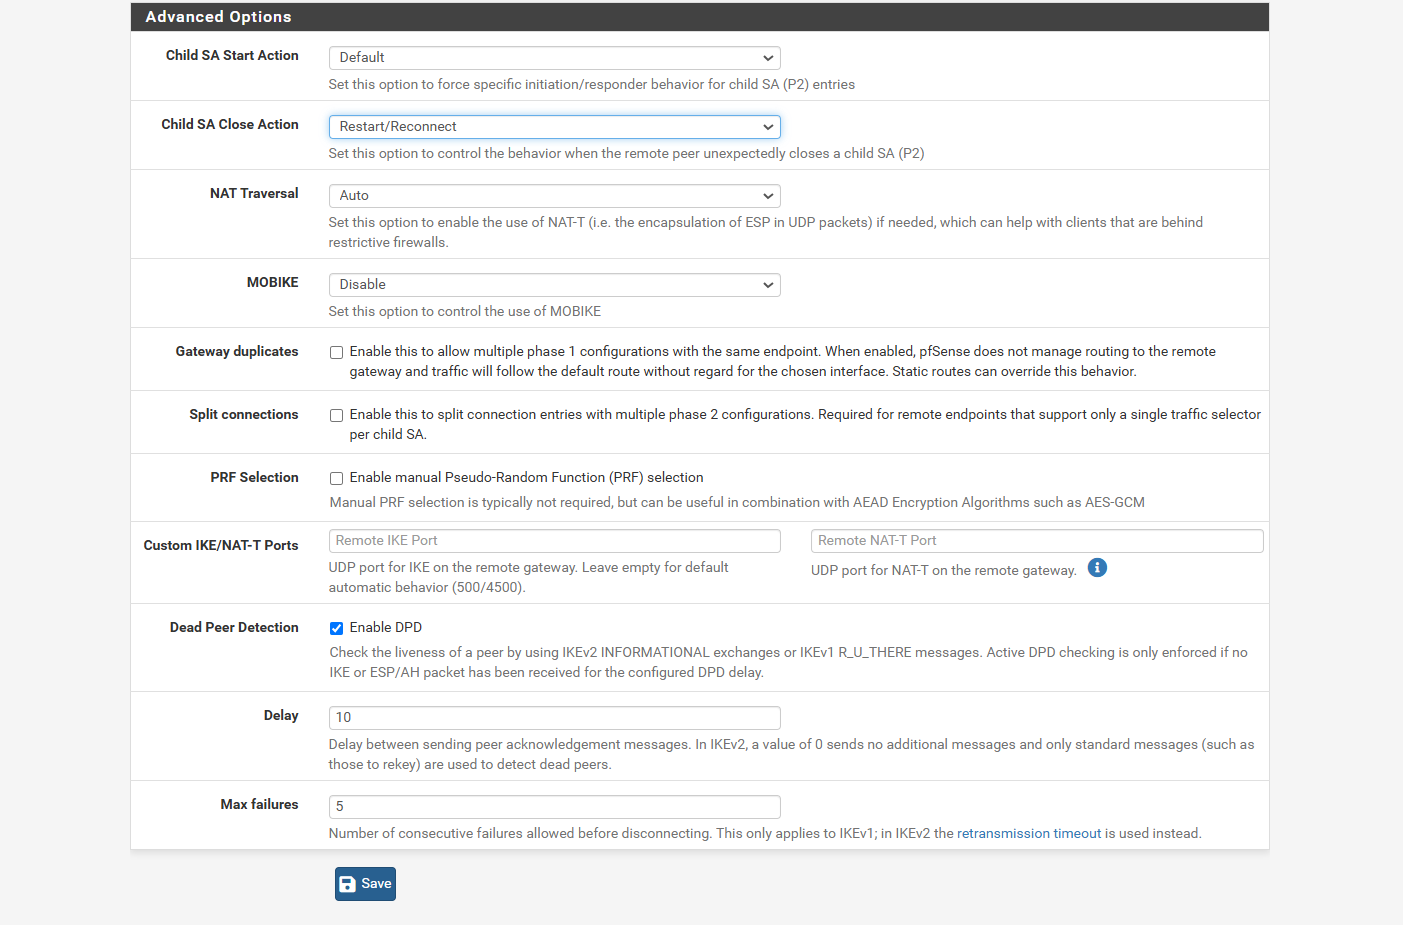
Step 7: Configure Advanced Settings
In the Advanced section:
- Set Child SA Close Action to Restart/Reconnect.
This allows the firewall to automatically reconnect the tunnel if it gets disconnected. - Set NAT Traversal to Auto.
This helps the firewall detect if the remote side is using NAT, which is especially useful when both local and remote networks have overlapping subnets.
Once done, click Save to finalize the Phase 1 settings.
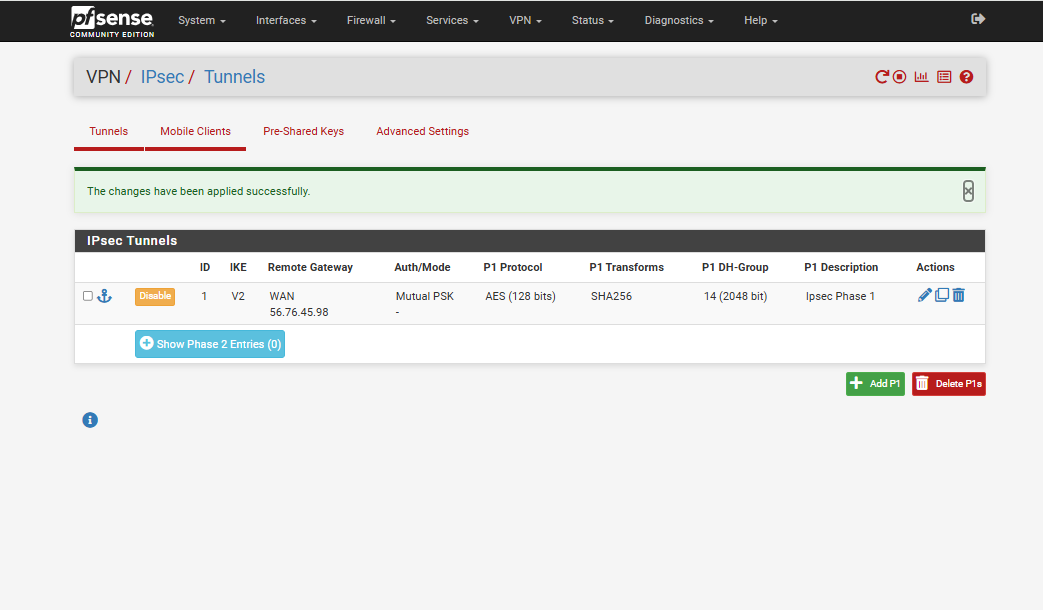
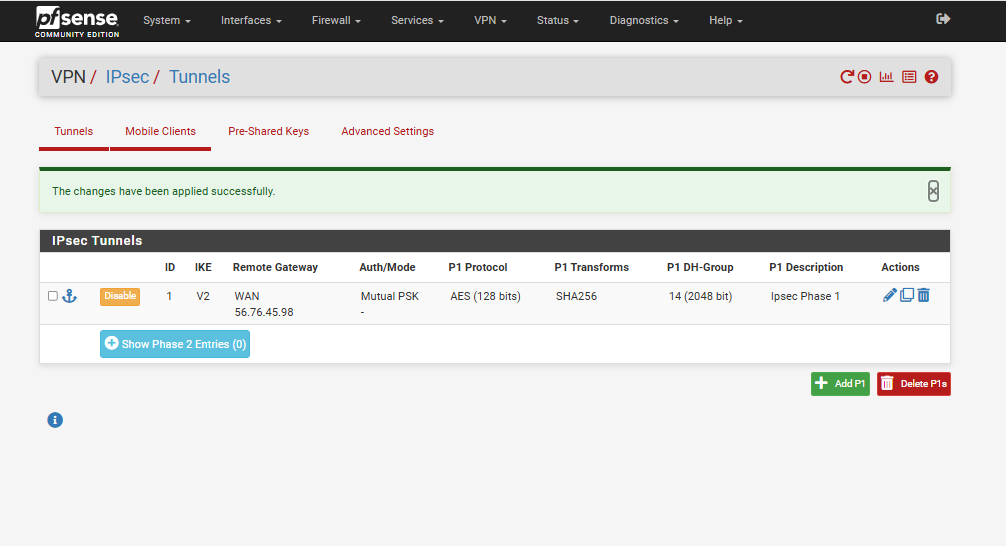
Step 8: Apply Changes and Proceed to Phase 2
- Once all Phase 1 settings are configured, click Apply Changes at the top.
This will save and activate your Phase 1 configuration.
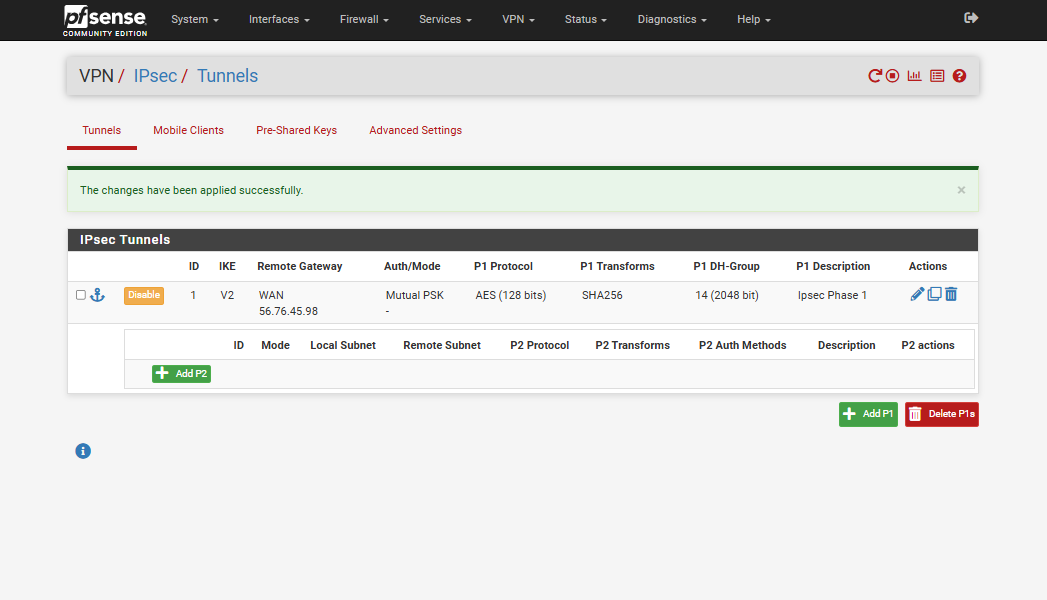
- To begin setting up Phase 2, click Show Phase 2 Entries, then click Add P2.
Phase 2 handles the actual data traffic between the two networks.
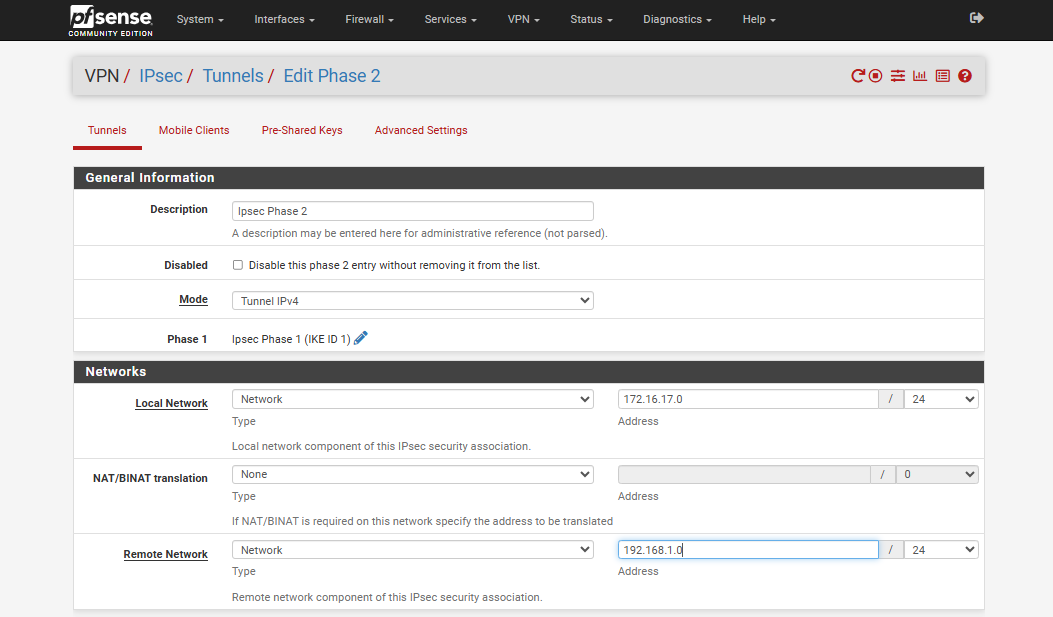
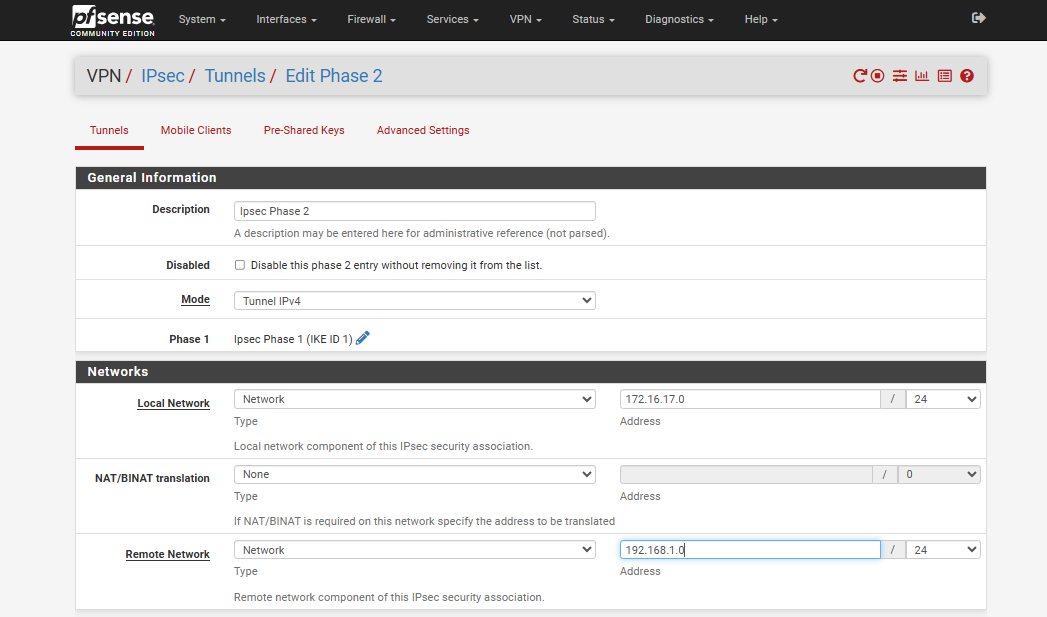
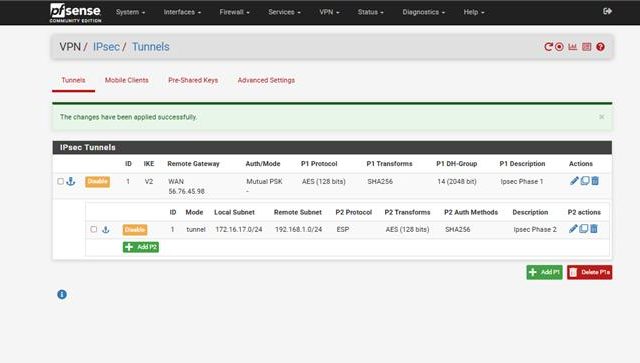
Step 9: Configure Phase 2 Settings
- Mode: Select Tunnel IPv4.
- Local Network: Enter the network provided by the QCloud team.
In most cases, this will be 172.16.17.0/24.
- Remote Network: Ask the remote side for their network details and enter them here.
If you are connecting to just one machine instead of a full network, you can choose Address instead of Network for both Local and Remote network fields.
After entering all the information, proceed to the next section to configure encryption settings.
Step 10: Set Phase 2 Encryption and Protocols
In this section, select the encryption algorithms and protocols that have been agreed upon by both the local and remote sides.
It’s important that both sides use the same settings, or the tunnel will not establish correctly.
Step 11: Set Phase 2 Lifetime
The default lifetime for Phase 2 is 3600 seconds (1 hour) in most firewalls, including pfSense.
You can change this value if needed, but make sure the same lifetime is set on both the local and remote firewalls to avoid connection issues.
Once done, click Save, and then Apply Changes to activate the Phase 2 settings.

Step 12: Finalize the Configuration
After completing all the settings in Phase 2, click Save, and then click Apply Changes.
⚠️ Important:
Make sure that all the configurations in Phase 1 and Phase 2 exactly match the settings on the remote side.
Any mismatch (e.g., encryption settings, IP addresses, lifetimes, etc.) can prevent the tunnel from establishing.
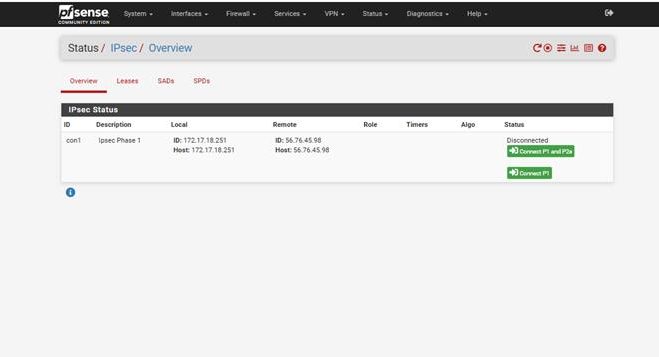
Step 13: Verify Tunnel Status
Once everything is configured:
- Click the Status button (highlighted on the IPsec page) to view the tunnel status.
This will show you whether Phase 1 and Phase 2 are up and running, and if traffic is flowing through the tunnel correctly.
If both phases are shown as “Established” or “Up,” your VPN tunnel is successfully connected.
Step 14: If the Tunnel is Not Up
If the tunnel is not established, the status page will look like the example below.
- Click the Connect button (highlighted on the page) to manually attempt to bring the tunnel up.
- If the tunnel still doesn’t connect, you’ll need to review all your Phase 1 and Phase 2 settings carefully.
Note: In this demo, we are using sample (pseudo) IP addresses — so the tunnel will not actually establish. In a real setup, the tunnel should come up if all settings match between both sides.