Port Forwarding in pfSense (NAT Rule Setup) #
To allow access to a specific port or forward a port to a private/internal machine, you need to create a NAT rule in pfSense. Follow the steps below:
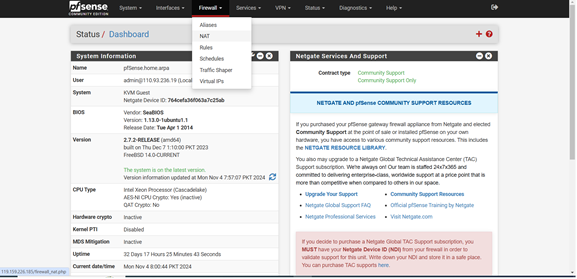
Step 1: From the top navigation bar, click on Firewall.
Step 2: Then, select NAT from the dropdown menu.
This will open the NAT configuration page where you can define port forwarding rules.
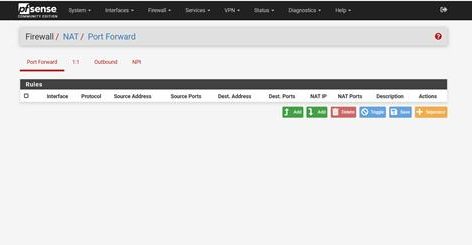
Step 3: Access the NAT Rules Page
On the NAT page, you will see a list of existing rules (which may be empty if no rules are created yet).
- Click the Add (+) icon to create a new port forwarding rule.
This will open the rule configuration page where you can define the details for port forwarding.
Step 4: Configure Basic Rule Settings
In the rule configuration page:
- Set Interface to WAN — this means the rule will apply to incoming traffic from the internet.
- Set Address Family to IPv4 — use this unless you are specifically working with IPv6.
These settings ensure the rule applies to standard public-facing IPv4 traffic.
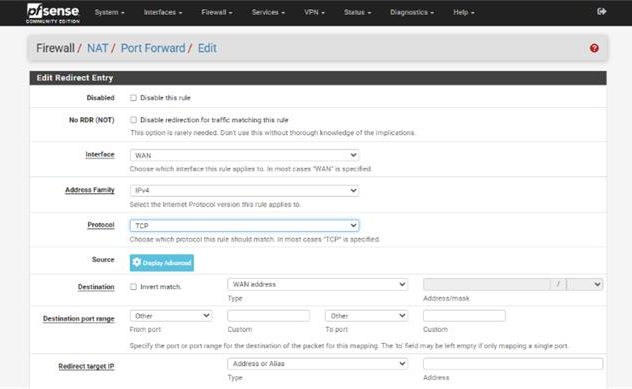
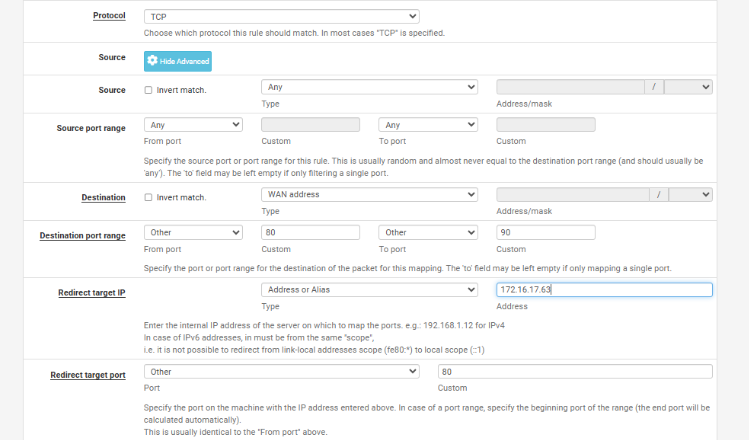
Step 5: Configure Protocol and IP Settings
- Protocol: Select TCP, UDP, or TCP/UDP depending on which protocol the service on your internal machine (ECS instance) uses.
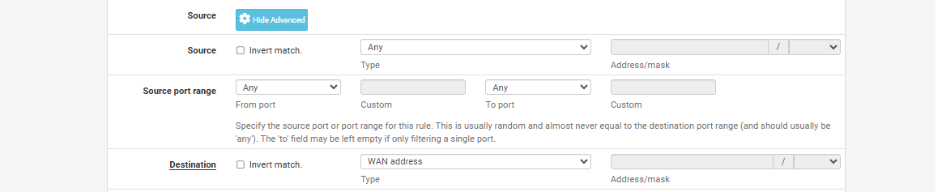
For example, use TCP for web servers (HTTP/HTTPS), UDP for services like DNS or VoIP. - Source: Leave this as Any if you want to allow connections from all public IPs on the internet.
This is useful if you’re not restricting access to specific IPs. - Destination: Enter your Public (WAN) IP address — the IP assigned to your firewall, listed in the Environment Details Sheet provided by QCloud.
- Redirect Target IP: Enter the Private IP address of your internal machine (your ECS instance) to which traffic should be forwarded.
- Interface: Should remain WAN, as the traffic is coming from the outside (internet).
This configuration tells pfSense to forward incoming traffic on a specific port to your internal system based on protocol and destination IP.
Step 6: Choose Your Port Mapping Type
At this point, you need to decide how the port forwarding should work:
If you want many-to-one port mapping (also called Port Address Translation – PAT), you can configure the firewall so that:
- Any incoming traffic from the Internet on a port range (e.g., ports 80 to 90)
- Is automatically forwarded to a single port (e.g., port 80) on your internal QCloud instance.
This is useful when multiple external ports are mapped to one specific internal port on your server.
Your configuration in this case will look like:
- Destination Port Range: From 80 to 90
- Redirect Target Port: 80
- Redirect Target IP: [Private IP of your ECS instance]
- NAT Type: Port Forwarding (PAT)
This is called Many-to-One Port Mapping, where multiple public ports map to one private service port.
Step 7: One-to-One Port Mapping (Direct Port Forwarding)
If you want a one-to-one mapping, where:
- Any incoming traffic from the Internet on port 80 is directly forwarded to port 80 on your private ECS instance,
Then configure the NAT rule like this:
- Destination Port Range: From 80 to 80
- Redirect Target Port: 80Redirect Target IP: [Private IP of your ECS instance]
- NAT Type: Port Forwarding (One-to-One)
This is called One-to-One Port Mapping, where the public port and private port are the same.

Step 8: Finalize and Save the Port Forwarding Rule
- In the Destination Port Range, enter 80 as both the From and To port values.
This tells pfSense to only allow traffic on port 80 (no range). - Redirect Target IP: Enter the private IP address of the internal machine (your ECS instance).
- Redirect Target Port: Enter the port number on which the service is running inside your private machine (e.g., 80 for a web server).
- Add a Description to help you identify this rule later (e.g., “Web server port 80 forwarding”).
- Finally, click Save.
Your port forwarding rule is now created and saved. pfSense will begin forwarding traffic based on the rule you’ve configured.

Step 9: Apply the Rule
After saving, you will see your newly created NAT rule listed at the bottom of the list.
- Click Apply Changes at the top of the page to activate the rule.
Once applied, pfSense will start forwarding traffic as per the rule.

Step 10: Accessing the Service
Your private service is now exposed to the internet.
This means it can be accessed from anywhere using your public IP address on port 80.
For example:
http://[Your Public IP]:80
Make sure the service inside your private machine is running and listening on the specified port.