IP Whitelisting in pfSense #
Step 1: Open the Firewall Rules Page
To allow (whitelist) specific IP addresses through your firewall, you need to create a rule under the firewall settings.
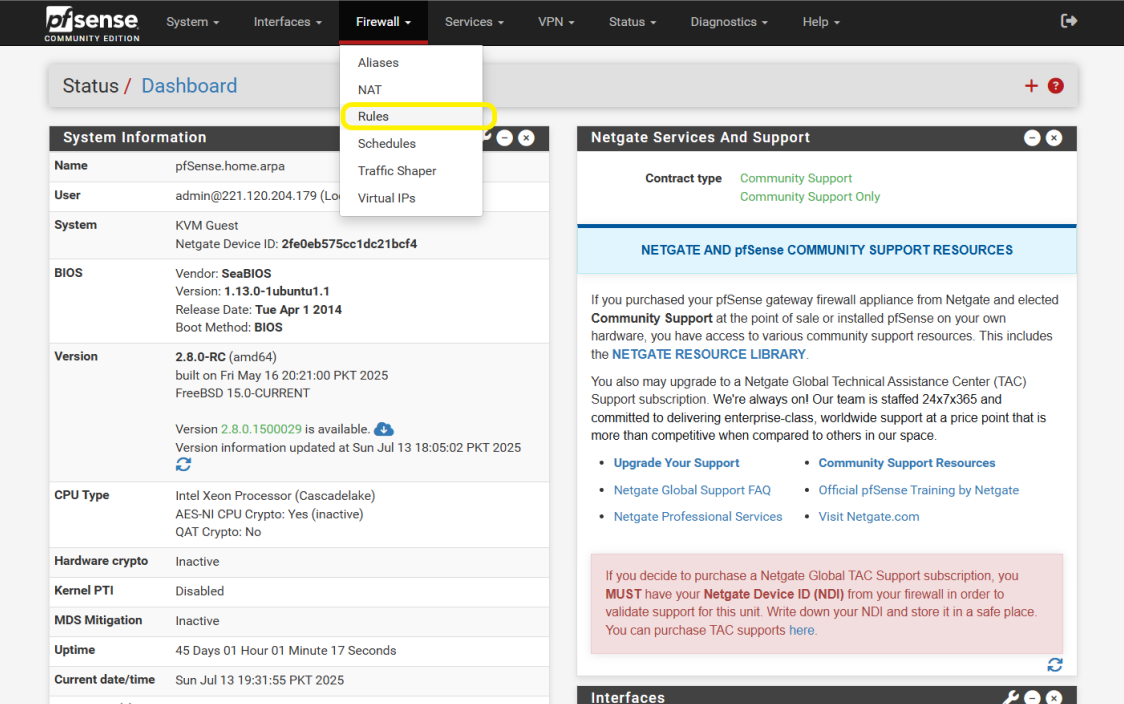
- From the pfSense home screen, go to the top menu and click:
Firewall > Rules
This will take you to the firewall rules page where you can define which IPs are allowed or blocked.
Step 2: Add a New Rule on the WAN Interface
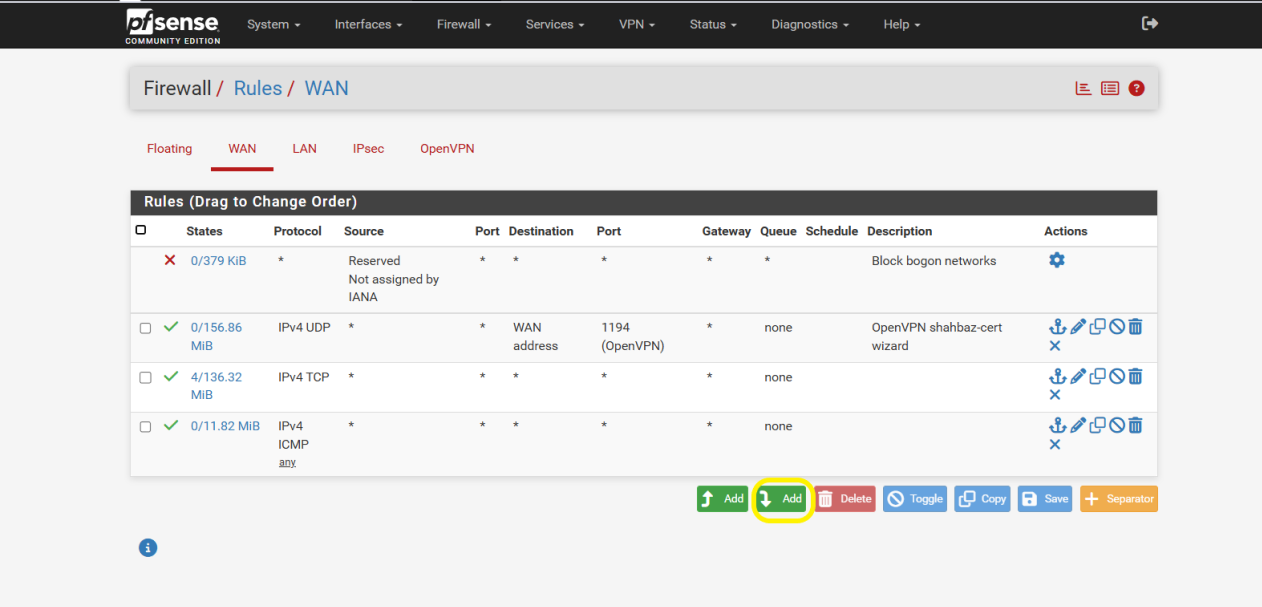
On the Firewall Rules page, you will land on the WAN tab by default:
Firewall / Rules / WAN
- Click the Add (+) button to create a new rule.
This will open a new screen where you can define the rule to whitelist a specific IP address.
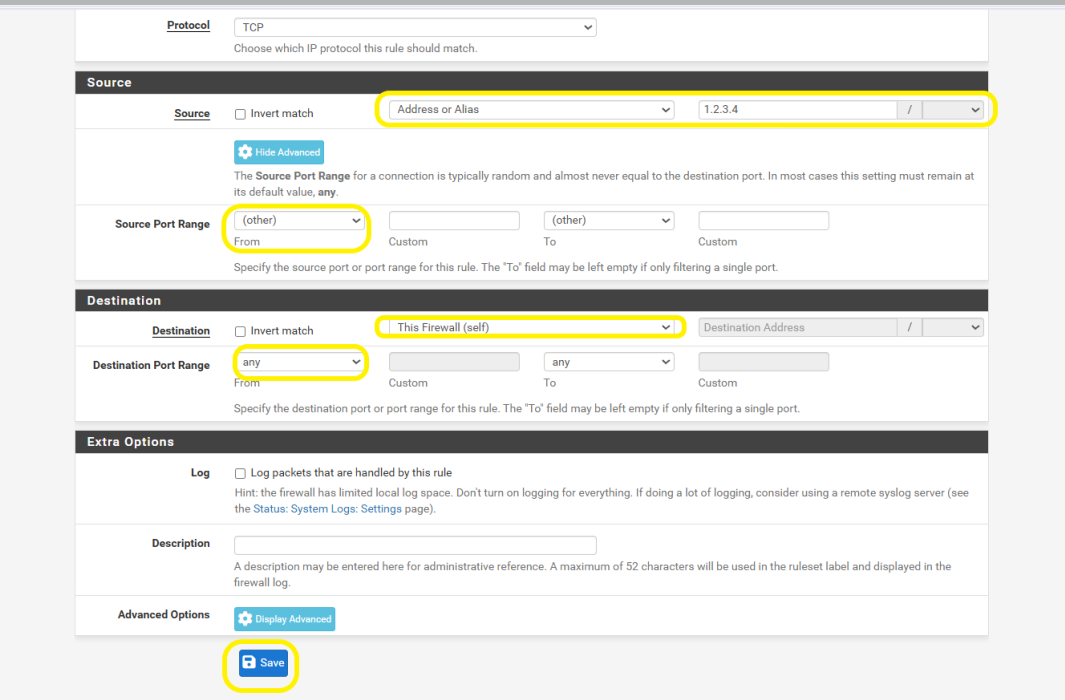
Step 3: Configure Source and Destination Settings
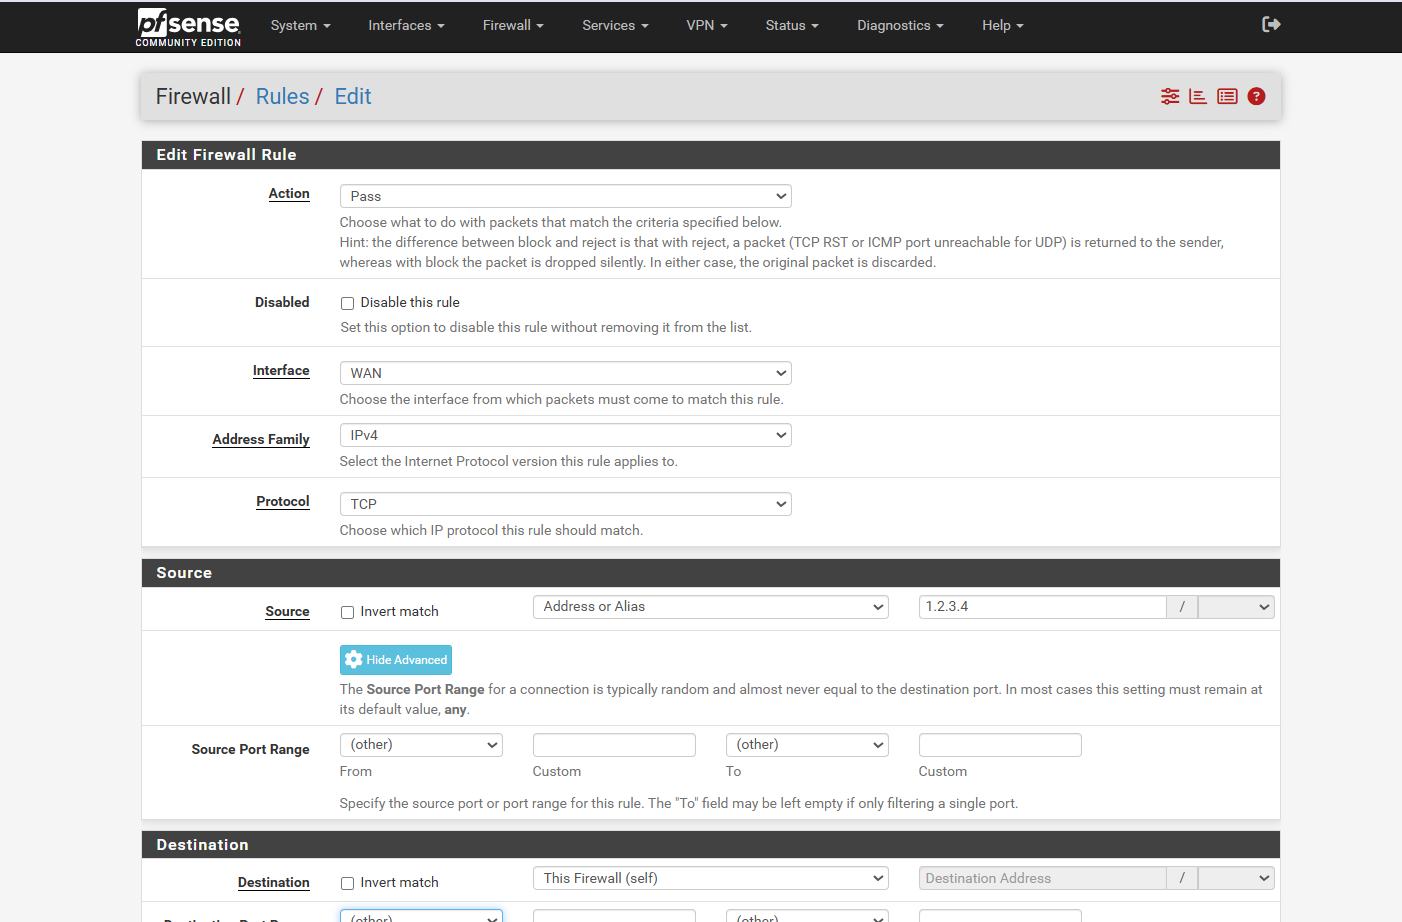
A new page titled Firewall / Rules / Edit will open.
Here, you will need to configure the following key fields:
- Source: Define the IP address you want to whitelist here (i.e., the trusted external IP).
- Destination: Set this to the internal IP or network you want to allow access to.
These settings ensure that only the specified source IP is allowed to reach your internal system or service.
Step 4: Finalize Rule Details and Save
After entering the required details:
- Source: Enter the IP address you want to whitelist.
You can also specify the source port if needed (usually left as “any”). - Destination: Enter the internal IP address or network where the traffic should be allowed (e.g., your private ECS instance and port, like port 80 for web access).
After completing the configuration, scroll down and click Save.
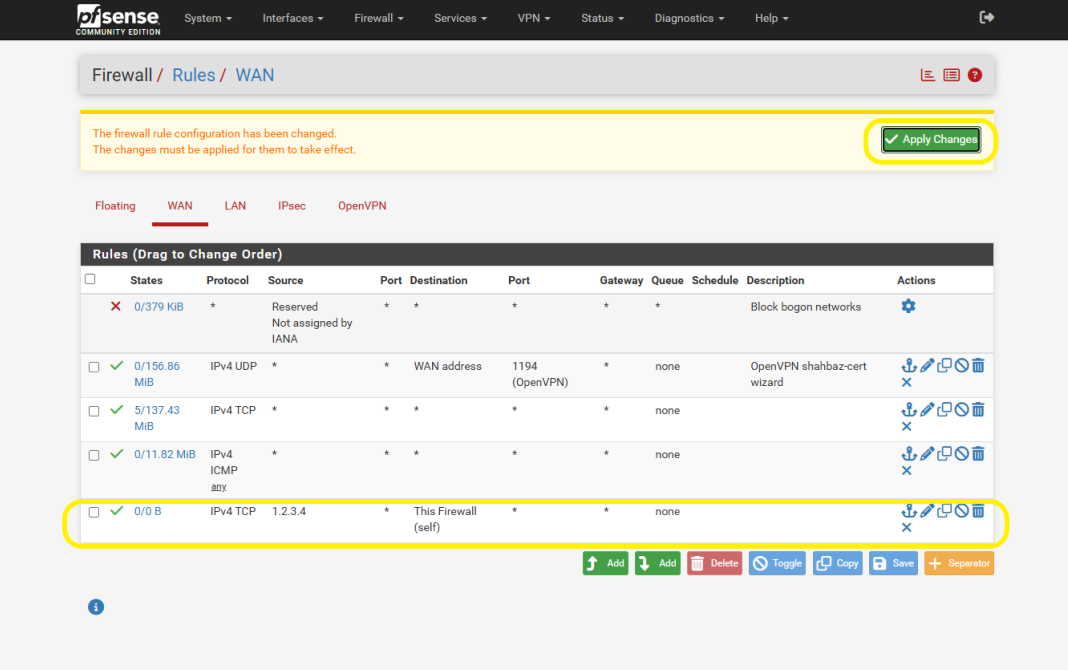
Step 5: Apply the Rule
After saving the rule:
- A new screen will appear prompting you to Apply Changes.
Click Apply Changes to activate the rule.
Your specified IP address is now whitelisted and will be allowed to access the destination system as defined.