An Object Store in QCloud, also called Object Storage Service (OSS) provides a highly scalable, secure, and durable storage solution for managing unstructured data such as documents, images, videos, and backups. It is designed to store and retrieve any amount of data from anywhere, offering seamless integration with QCloud compute and networking services. OSS enables users to manage data efficiently while ensuring reliability, performance, and cost-effectiveness.
Key Characteristics #
Scalable Storage: OSS provides flexible storage that can be expanded as your requirements grow, allowing you to manage increasing data volumes efficiently.
Data Durability & Availability: Built with redundancy and replication across multiple storage nodes, OSS ensures high data durability and availability, minimizing the risk of data loss.
Flexible Access Control: Granular access permissions let you control who can read, write, or manage objects, enhancing data security and compliance.
Easy Integration: OSS can be easily integrated with QCloud virtual instances, backup systems, and analytics tools, making it ideal for content storage, application data, and archival use cases.
With QCloud OSS, you can efficiently store, manage, and access your data at scale—backed by enterprise-grade security and reliability.
OSS Accessibility and Management #
AWS CLI Installation and Configuration Steps #
#
Step 1: Download AWS CLI
- Download AWS CLI in desired directory
- wget https://awscli.amazonaws.com/awscli-exe-linux-x86_64.zip
- unzip it: unzip awscli-exe-linux-x86_64.zip
- sudo ./aws/install
- sudo ./aws/install -i /usr/local/aws-cli -b /usr/local/bin
- Configure profile by following steps.
- Type aws configure than press enter
- Give AWS Access Key ID: [YOUR_ACCESS_KEY]
- Give AWS Secret Key: [YOUR_SECRET_KEY]
- Default region name [none]: press enter
- Default output format [none]: press enter
Step 2: To Check File Count
aws –endpoint-url <ENDPOINT_URL> s3 ls s3://<BUCKET_NAME>/<PATH> –human-readable –summarize –no-verify-ssl
EXAMPLE
aws –endpoint-url https://oss.qcloud.pk s3 ls s3://my-bucket/data/my-data –human-readable –summarize –no-verify-ssl
Step 3: To Download
aws –endpoint-url s3 cp s3://[bucket-name]/[path/] [destination-directory] –recursive –no-verify-ssl
EXAMPLE
aws –endpoint-url https://oss.qcloud.pk s3 cp s3://my-bucket/data/my-data /backups –recursive –no-verify-ssl
Step 4: To Upload
aws –endpoint-url s3 cp [source-directory] s3://[bucket-name]/[path/] –recursive –no-verify-ssl
EXAMPLE
aws –endpoint-url https://oss.qcloud.pk s3 cp /local-data s3://my-bucket/data/upload –recursive –no-verify-ssl
Steps to Access from GUI using S3 Browser #
#
Download S3 Browser from below URL
https://s3browser.com/download.aspx
Open the S3 browser and follow the below steps. 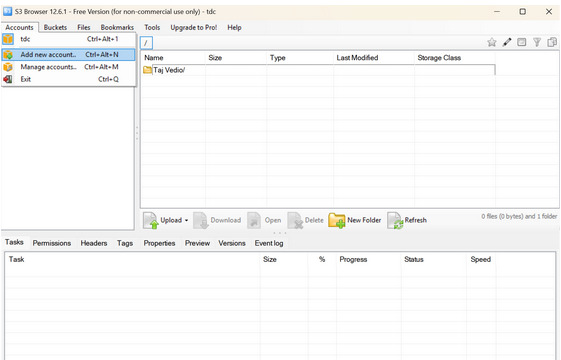
Step 1: To Navigate
To begin, navigate to the top left pane of the interface, open the ‘Accounts‘ menu, and then select the option ‘Add New Account‘ to initiate the process of configuring your new storage account.
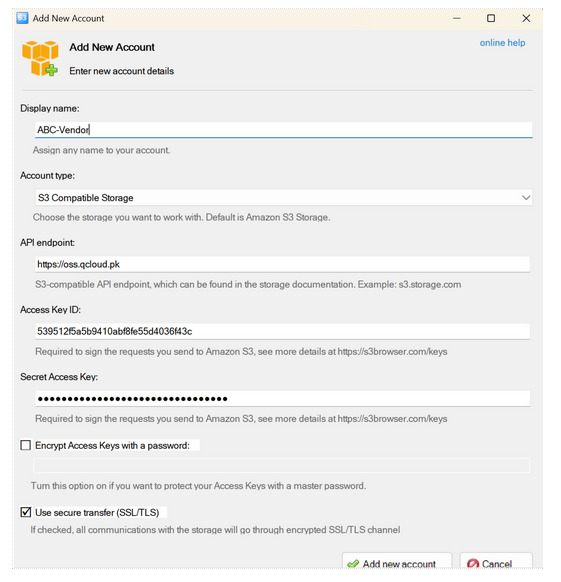 Step 2: To configure an S3-compatible storage account, use the following details
- Access Key: [Your provided ACCESS_KEY]
- Secret Key: [Your provided YOUR_SECRET_KEY]
- API Endpoint URL: https://oss.qcloud.pk
- Account Type: S3 Compatible Storage
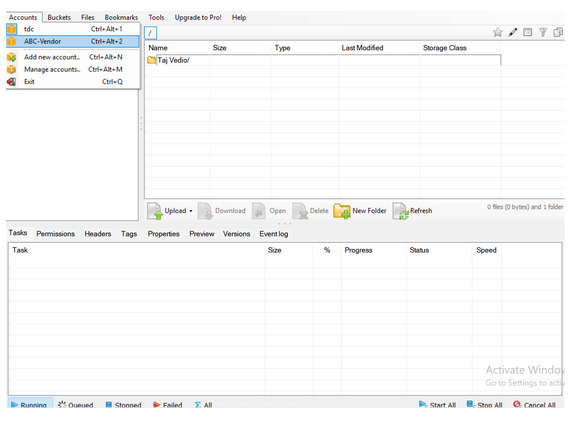 Step 3: Newly Created Account List
After clicking on the ‘Account’ menu in the interface, you will now see the newly created account listed there, which is identified as ‘ABC vendor’.
To create a new bucket, click on the “+New bucket” button. In the creation dialog, specify the bucket name as test-bucket and set the Bucket region to Default Region. Finally, click “Create New Bucket” to proceed with creating the bucket.
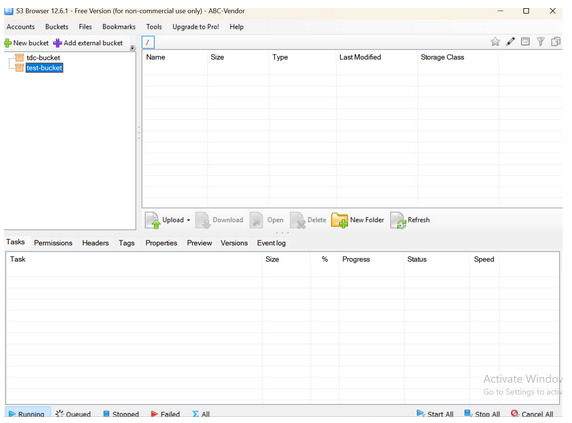 Step 4: Test-Bucket listed
You may now see the test-bucket listed here in the interface, confirming that it has been successfully created and is ready for use.
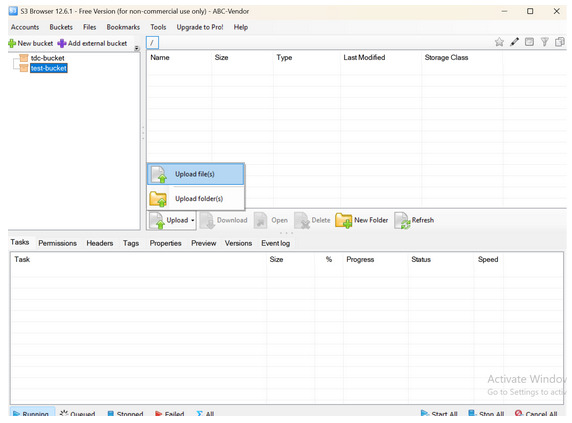 Step 5: Upload Files and Folders
To upload a file or folder, click on the Upload button, where you will see the options to Upload file(s) and Upload folder(s). If you intend to upload a file, select Upload file(s), or if you need to upload an entire folder, choose Upload folder(s) to proceed.
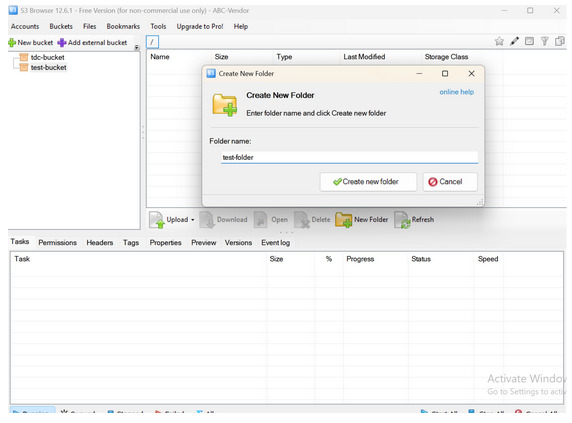 Step 6: Folder Creation inside Bucket
To create a new folder inside a bucket, click on the +New Folder button, enter the desired name for the folder (e.g., test-folder), and then click Create New Folder to finalize the action. The folder will now appear within the bucket structure.
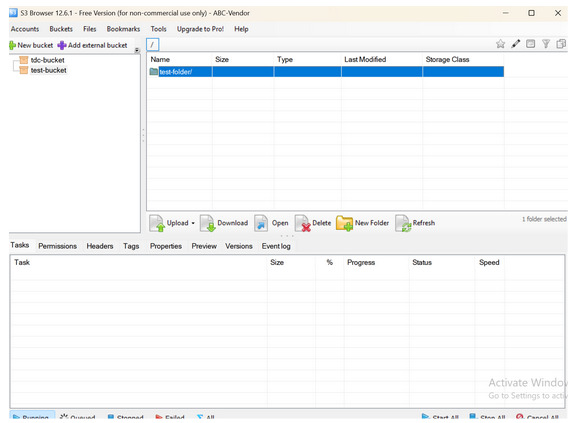 Step 7: Appearance of Test-Folder
The newly created folder named test-folder now appears here in the current directory view, confirming that it has been successfully created and is ready for use.
The newly created test-folder appears here
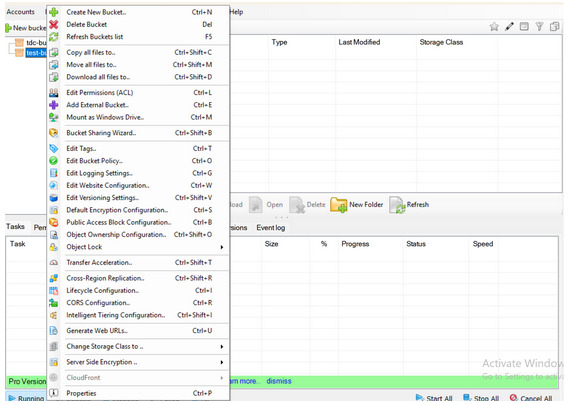 Step 8: How to Delete a Bucket
To delete a bucket, simply right-click on the desired bucket from the list and select the Delete bucket option from the context menu that appears..
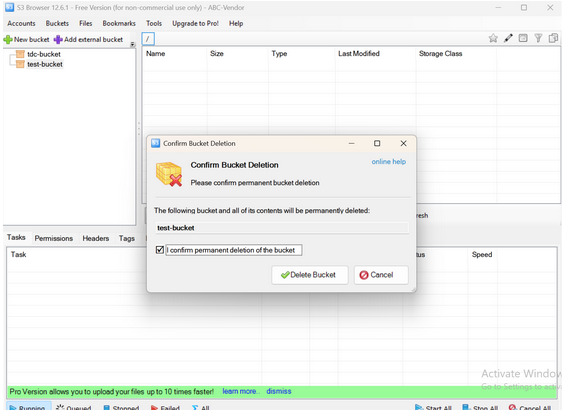 Step 9: Select Delete Option
When you select the option to delete a bucket, a confirmation message will appear. To proceed, tick the confirmation checkbox (if applicable) and then click the “Delete Bucket” button to permanently remove the bucket and all its contents.
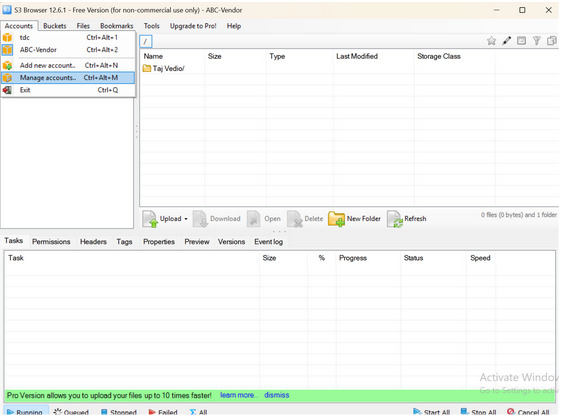 Step 10: Removal of an Account
To remove an account, navigate to the Accounts section from the menu, then select Manage Accounts. This will display a list of all configured accounts, as illustrated in the following reference image. From this list, you can select the specific account you wish to delete.
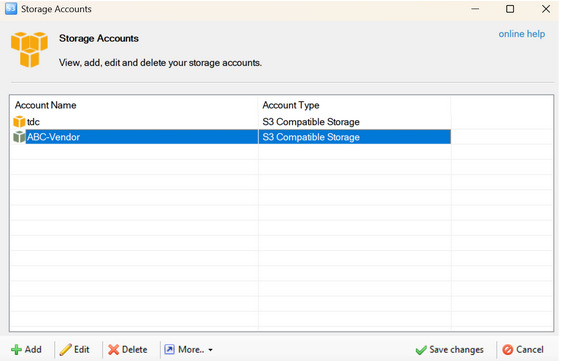
To delete an account, select the desired account from the list under Manage Accounts, click the “Delete” (X) button associated with it, and then confirm the action by clicking “Save Changes” to finalize the removal.